If you are on Blogger, this post is for you! Blogger comes with standard themes that you can choose from, but further customizations are allowed using the Blogger Template Designer. Have you checked it out? Here’s how.
1. Go to your Blogger dashboard.
2. Click on Template.
3. Click on Customize.
4. At the top, click on Advanced (don’t worry – you don’t need a degree!)
This is what you should see.
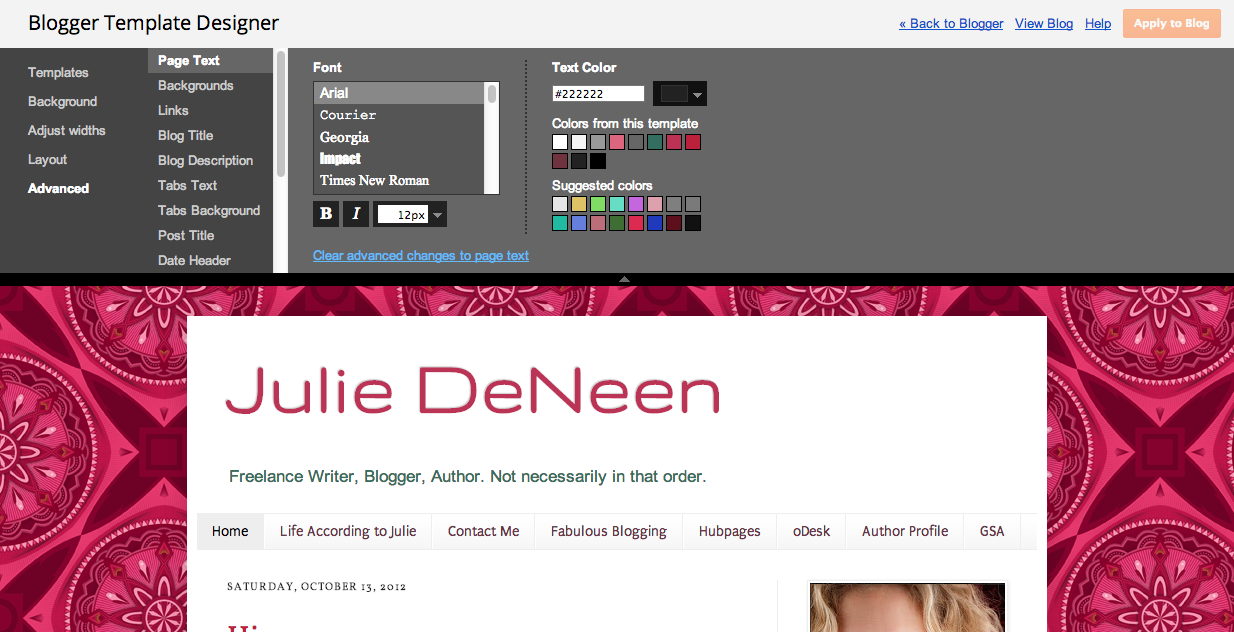
This is what it will look like when you get into the advanced blogger template designer.
Now, it’s time to play around. Notice your blog is underneath the black box. This is so you can see the changes before you apply them to your blog. I’ll go through each advanced option and explain what it means.
- Page text: This allows you to customize what your default font is for your posts. You can change the font, the color, and the size too.
- Backgrounds: There are three backgrounds in most blogger templates, the main background, the white space that holds all your content, and the header background (where your title is). If you aren’t using an image as a background or for a customized header, you can adjust the colors to each of these areas.
- Links: You can customize the color of unvisited links (what they look like before a reader presses on it), the visited link (after the reader has clicked), and what happens when the reader just hovers his/her mouse over the link.
- Blog Title: This is only customizable if you aren’t using a custom header. Change the font, size, and color.
- Blog Description: You cannot adjust the font type, but you can adjust the color and size. This is the tag line of your blog.
- Tabs Text: Want to change the look of your menu bar? Here’s where you do it. It allows you to change the font color and size, as well as the box color when the reader is on a particular page.
- Tabs Background: This is where you choose the color of your menu bar.
- Post title: You can change the default font type, size, and color of each blog post. It makes a global change to all posts.
- Date header: You can change the color and size, but not the font type of your dates.
- Post footer: Change the color and size of the text in the footer of your blog.
- Gadgets: For each gadget, you probably have titles and descriptions. You can change the font type, size, and color.
- Images: If you want a border on your images, change the color in this area.
- Accents: Change the colors of the lines in the tabs of your menu bar or the separators between posts.
- Mobile: Change the color of the button that appears on devices that are reading your blog. You’ll have to look on your smartphone to view the changes.
Here’s the most important part. YOU MUST HIT APPLY TO BLOG – it’s the orange button on the top right. Otherwise your changes will not take effect.
Once you’ve made changes, you might find your blog width needs adjusting. Just go to adjust widths and see if you can get it to look right. Have fun!